Have you noticed that the Nebra Helium Hotspot is accepting connections from port 22222 (easyengine) but when you try to connect to it with ssh it complains about not having a valid key? Well in this tutorial I will show you how to add a public ssh key to allow local ssh access.
Prerequisites:
- Micro eMMC/SD card reader
- Physical access to the Nebra Hotspot
- SSH Client that support key authentication
- ssh public key you want to add (debian tutorial)
- a computer to modify config.json file (FAT32 format)
Step 1: Disconnect Nebra Hotspot from power and Remove eMMC/SD card (See Figure 1)
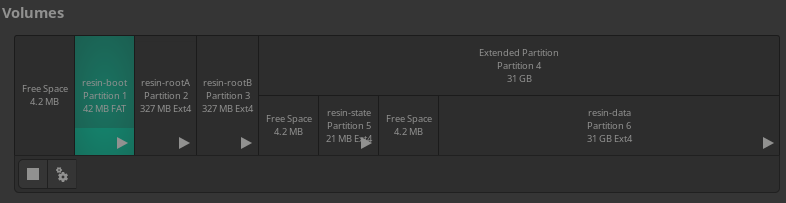
Step 2: Plug eMMC/SD card into computer, open “resin-boot” partition, and Locate config.json file (Backup this file)
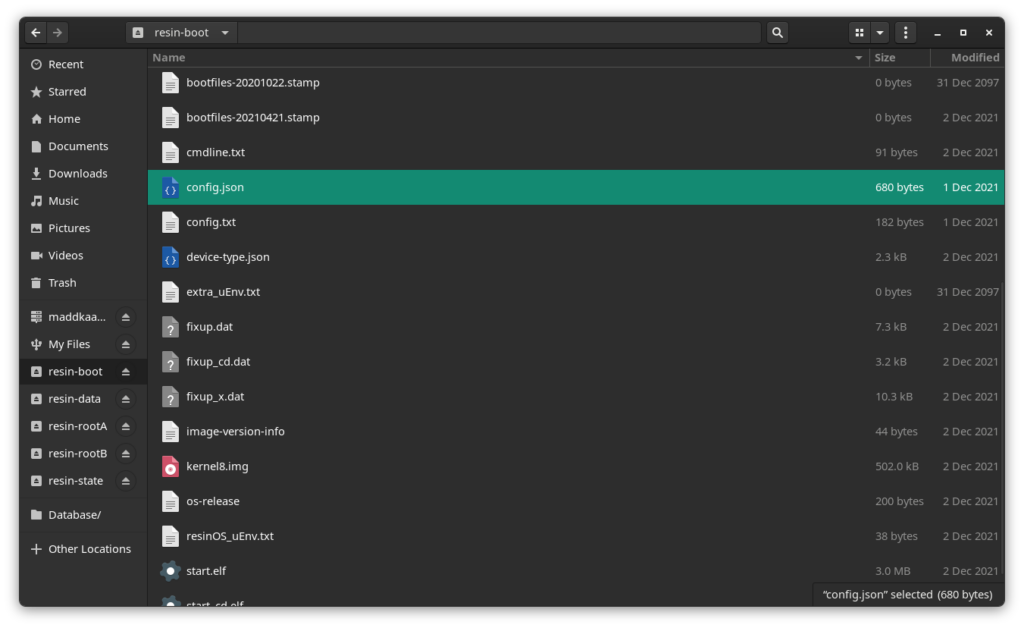
Step 3: Open config.json in your preferred text editor should look similar to the one provided below
{
"apiEndpoint":"https://api.balena-cloud.com",
"appUpdatePollInterval":900000,
"applicationId":1...3,
"deltaEndpoint":"https://delta.balena-cloud.com",
"deviceApiKey":"45...7",
"deviceApiKeys":{
"api.balena-cloud.com":"45...7"},
"deviceType":"nebra-hnt",
"files":{
"network/network.config":
"[service_home_ethernet]\nType=ethernet\nNameservers=8.8.8.8,8.8.4.4"},
"listenPort":48484,
"mixpanelToken":"7f...c",
"registryEndpoint":"registry2.balena-cloud.com",
"userId":2..1,
"vpnEndpoint":"vpn.balena-cloud.com",
"vpnPort":443,
"uuid":"0a...6",
"registered_at":24...7,
"deviceId":74...2
}
Step 4: Add SSH keys to config.json (see code below, balenaos doc). Should look similar to the file below. Save the file and back it up.
{
"apiEndpoint":"https://api.balena-cloud.com",
"appUpdatePollInterval":900000,
"applicationId":1...3,
"deltaEndpoint":"https://delta.balena-cloud.com",
"deviceApiKey":"45...7",
"deviceApiKeys":{
"api.balena-cloud.com":"45...7"},
"deviceType":"nebra-hnt",
"files":{
"network/network.config":
"[service_home_ethernet]\nType=ethernet\nNameservers=8.8.8.8,8.8.4.4"},
"listenPort":48484,
"mixpanelToken":"7f...c",
"registryEndpoint":"registry2.balena-cloud.com",
"userId":2..1,
"vpnEndpoint":"vpn.balena-cloud.com",
"vpnPort":443,
"uuid":"0a...6",
"registered_at":24...7,
"deviceId":74...2,
"os": {
 "sshKeys": [
  "ssh-rsa AAAAB3Nza...M2JB balena@macbook-pro",
  "ssh-rsa AAAAB3Nza...nFTQ balena@zenbook"
 ]
}
}
Step 5: Safely remove eMMC/SD card and reinstall into Nebra Hotspot.
Step 6: Power up Nebra Hotspot, locate local IP address, and login using username “root” and port 22222 with ssh client.
Note: the ssh client you use to login must be configured to use the private key pair to one of the ssh public keys you added.
ssh root@<NebraIP> -p 22222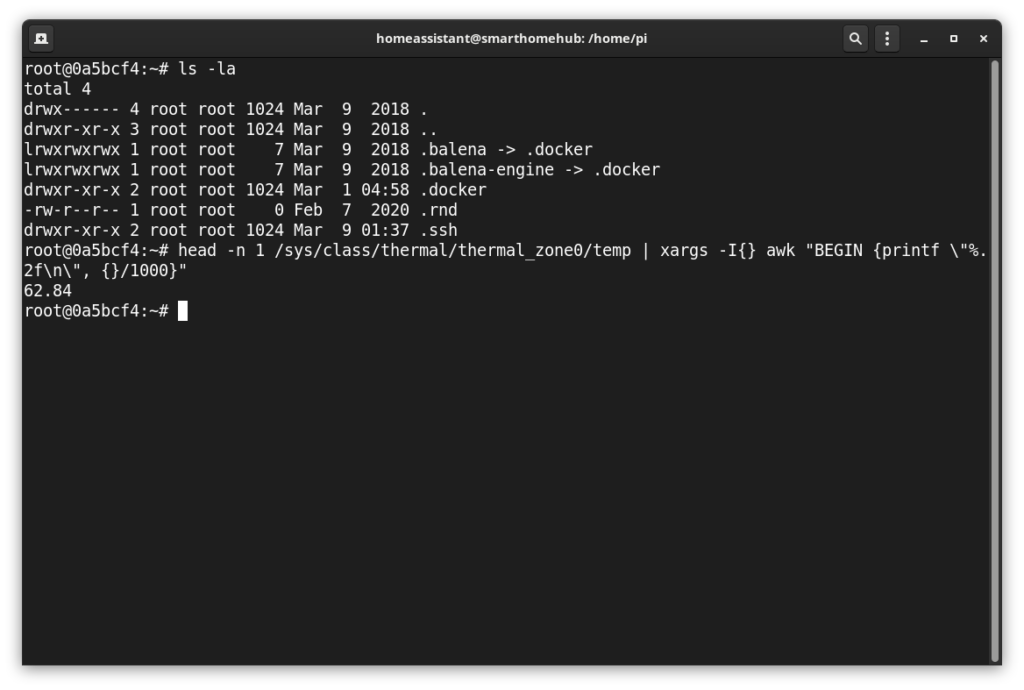
That is it!
With SSH shell access the possibilities are nearly endless but to get you started here is a command to get the Hotspot CPU temp:
head -n 1 /sys/class/thermal/thermal_zone0/temp | xargs -I{} awk "BEGIN {printf \"%.2f\n\", {}/1000}"You can also check the logs using the below command. Note: This only goes back to when the system last booted no logs are saved to disk by default.
journalctl